Fusion Plasma Cold and Warm Pro Machine
Dual Plasma Care in One System
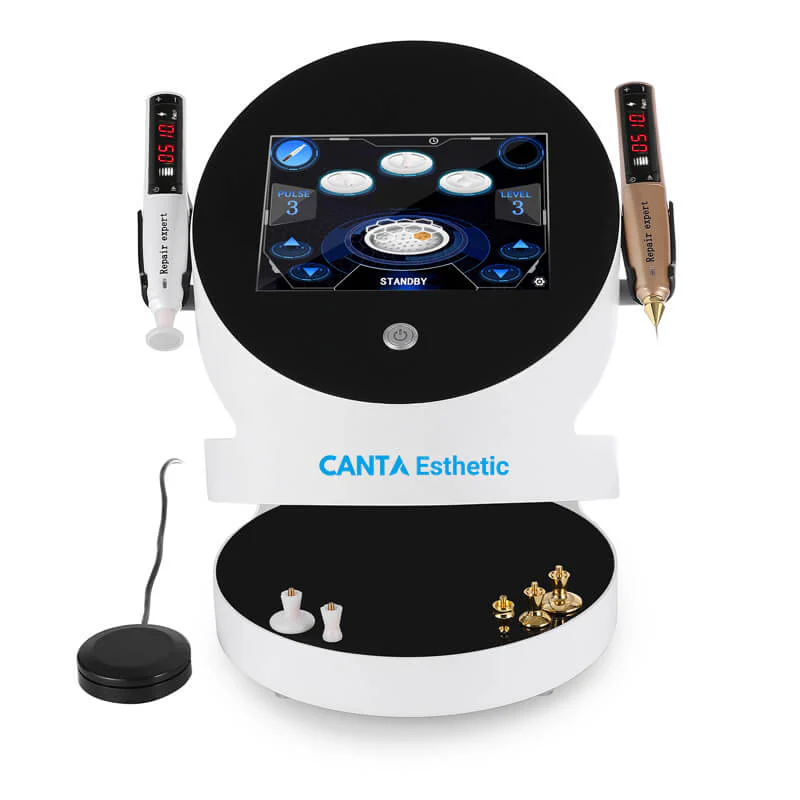
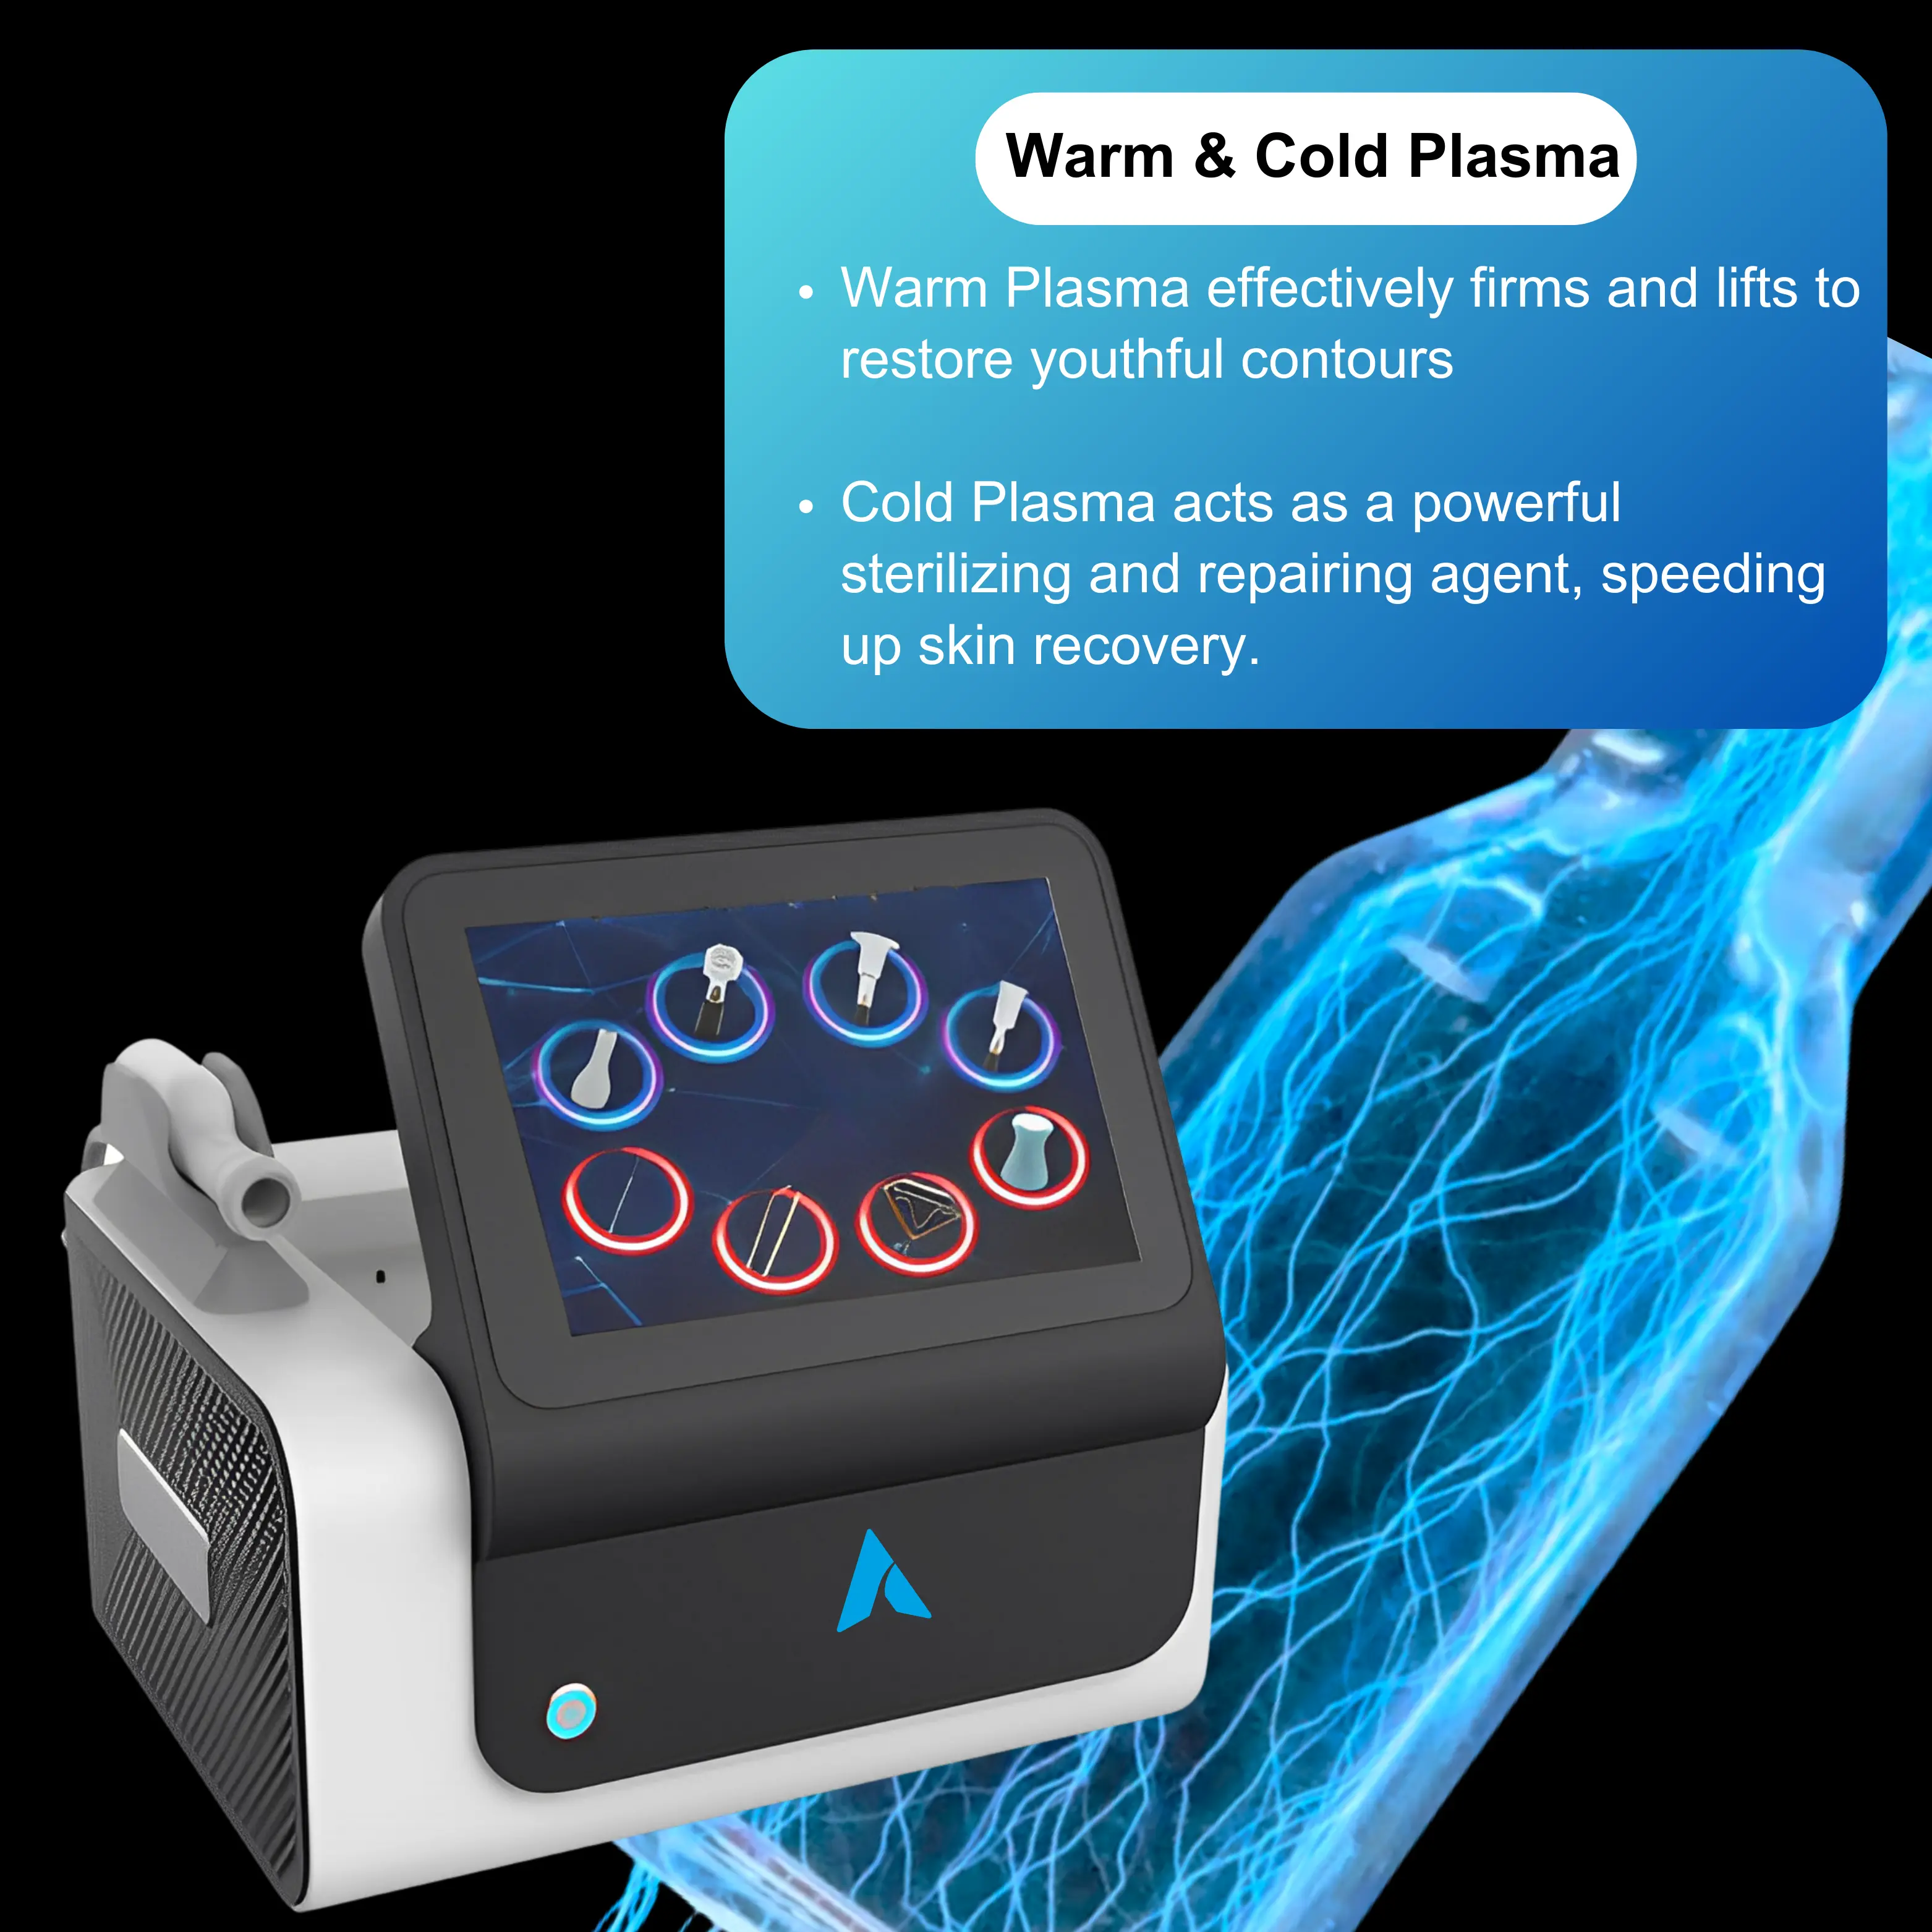
The Fusion Plasma Cold and Warm Pro Machine combines cold plasma and warm plasma functions in one compact aesthetic system. It helps salons expand their treatment menu with options for skin texture care, firming-focused services, calming care, scalp applications, and targeted aesthetic work.
Fusion Plasma: Integrating two cutting-edge beauty technologies, Canta Esthetic delivers a premium skin restoration journey.
Cold & Warm Plasma in One System
Fusion Plasma combines cold plasma and warm plasma functions in one professional aesthetic device, helping salons expand services for skin texture care, firming-focused treatments, calming care, and targeted skin renewal.
Warm Plasma for Firming-Focused Skin Care
Warm plasma delivers controlled plasma energy to the skin surface, helping support collagen production, improve the look of fine lines, and refine uneven skin texture.
It is designed for salons that want to offer skin-firming and rejuvenation-focused services with adjustable settings and interchangeable treatment tips.
Key Benefits
-
Supports firmer-looking skin
-
Helps refine fine lines and texture
-
Suitable for targeted facial care
-
Works with interchangeable plasma tips
Gas-Assisted Cold Plasma Care
Cold Plasma mode uses gas-assisted plasma output to support low-heat skin care applications. It is designed for salons that want to offer calming care, oil-control support, post-treatment skin comfort, and skin-balancing services.
Unlike regular warm plasma output, gas-assisted cold plasma is created with conductive gas support, such as argon or helium. This helps deliver a cooler plasma experience for sensitive, redness-prone, or blemish-prone skin-care routines.
Key Benefits
-
Calming Skin Support
Helps comfort skin after intensive facial treatments and supports a balanced-looking complexion. -
Oil-Control Care
Suitable for salons offering facial services for oily or blemish-prone skin types. -
Low-Heat Plasma Output
Designed for skin-care applications where comfort and controlled energy delivery matter. -
Post-Treatment Care Option
Can be added after selected facial or plasma treatments to support a cleaner, calmer treatment experience.
Warm Plasma vs. Traditional Plasma Pens
Warm Plasma is designed for salons that want a more flexible alternative to traditional point-by-point plasma pen services. With adjustable settings and interchangeable tips, it supports firming-focused care, texture refinement, and targeted skin renewal applications.
-
More Controlled Energy Delivery
Warm Plasma uses adjustable plasma output, allowing operators to start low and increase gradually based on the treatment area and client response. -
Firming-Focused Skin Care
Supports collagen-focused treatments for clients concerned with visible laxity, fine lines, and uneven texture. -
Flexible Treatment Options
Compared with traditional plasma pens that are often used for small point-by-point work, Fusion Plasma supports multiple tip options for facial, neck, scalp, and targeted aesthetic applications. -
Treatment-Friendly Workflow
The touchscreen interface supports probe selection, working time, remaining time, shot count, and start/pause control, helping salons manage each session with a clearer workflow.
|
Comparison items |
Warm Plasma Technology ✔ |
Traditional Fibroblast Technology ❌ |
|
Treatment |
Non-invasive, gentle, and efficient |
Invasive, causing epidermal carbonization.
|
|
Pain |
Almost no pain, low temperature, and high efficiency |
painful, anesthesia required |
|
Treatment time |
15-20 minutes for the whole face |
Treatment take longer than 20 minutes |
|
Recovery period |
Short, only 2-3 days required |
Long, eschar caused in treatment takes 7-10 days to fall off |
|
Scope of application |
Applicable to the face, around the eyes, and neck. |
Mainly used for point-to-point small-scale treatment |
|
Appearance after treatment |
There is no eschar, only slight white spots |
Obvious black eschar, easy to cause scabs |
✅ Warm Plasma utilizes upgraded technology to reduce trauma and accelerate restoration, making it ideal for customers who want to tighten and lift their skin without a long recovery period!
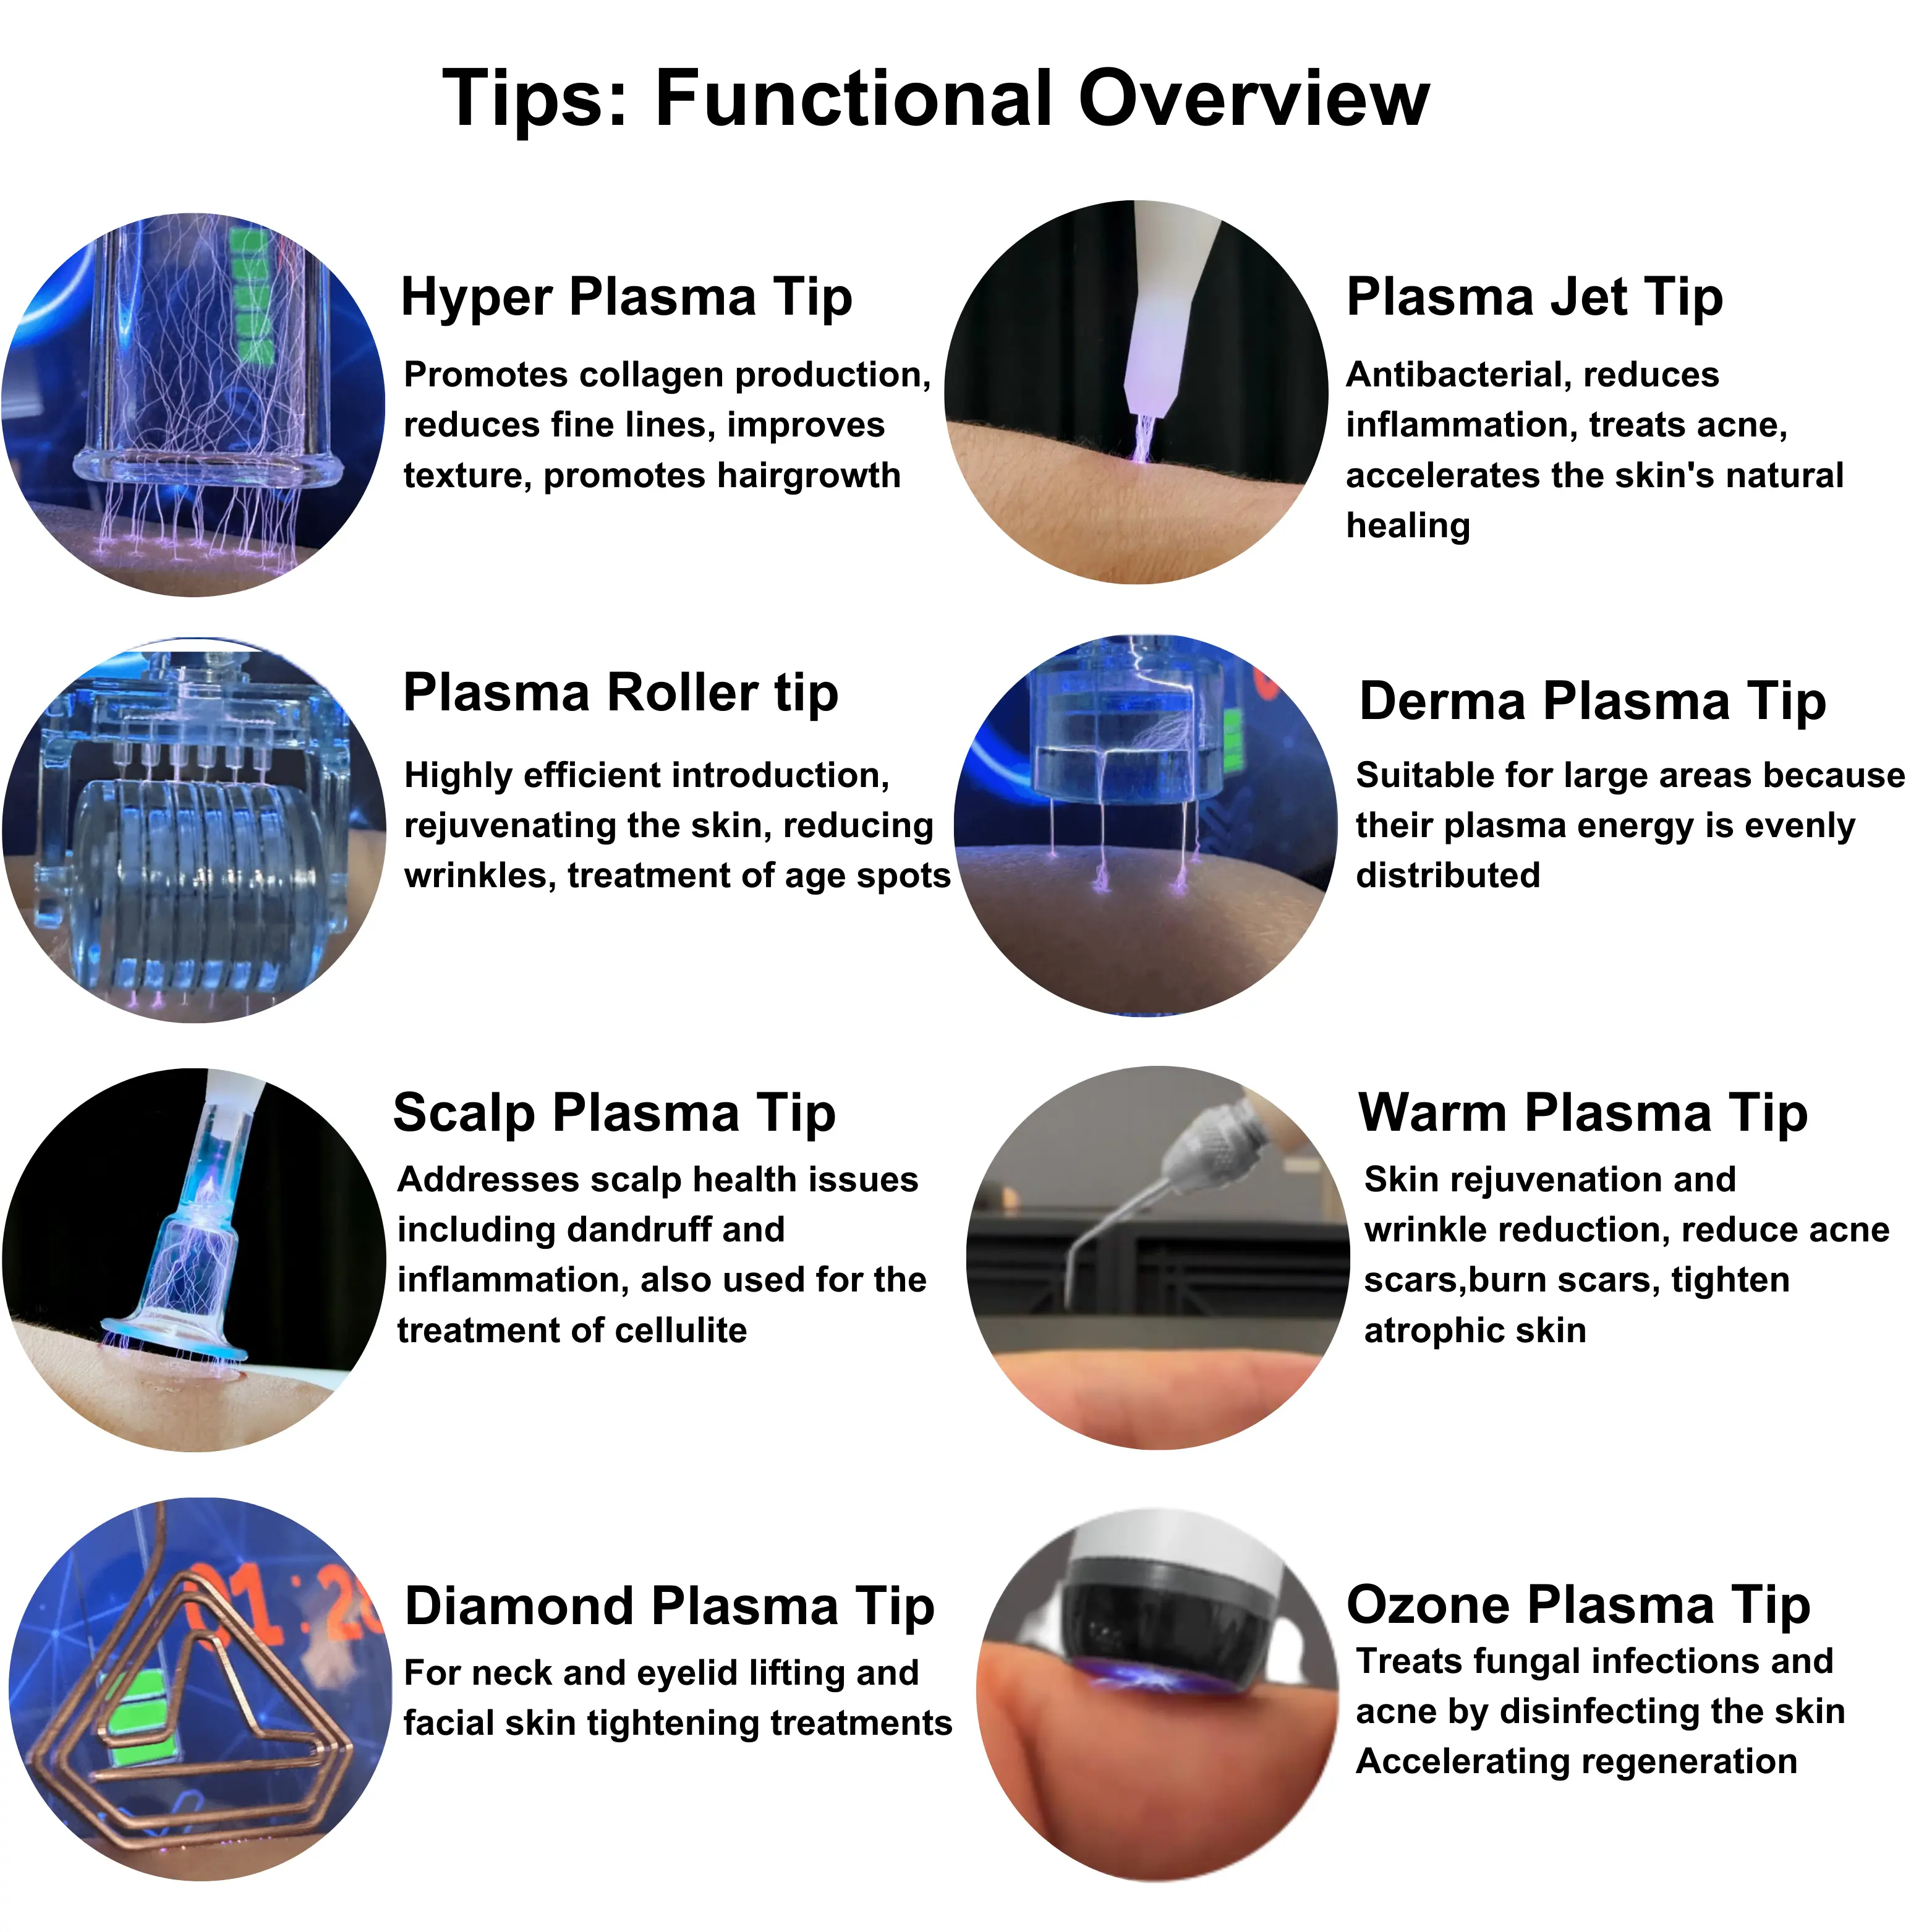
The core functions and applicable issues of the 8 handles
|
Probe type |
Core functions |
Applicable issues |
|
Hyper Plasma Tip |
Deep sterilization promotes hair growth. |
Acne, eczema, dermatitis, hair loss |
|
Ozone Plasma Tip |
Anti-inflammatory and anti-acne skin barrier restoration |
Rosacea, hormone-dependent dermatitis, postoperative infection |
|
Diamond Plasma Tip |
Gently rejuvenation for the whole face glowing. |
Rough skin, nasal folds, dull faces
|
|
Derma Plasma Tip
|
Precisely bumpin' skin for deep wrinkles and tackling acne and scars |
Stretch marks, acne scars, nasolabial folds |
|
Plasma roller tip |
Large area skin lifting and firming, assisted with essence penetration |
Sagging neck and losing facial contours |
|
Scalp Plasma Tip |
hair follicle activation and hair growth stimulation |
Hair loss, dandruff, hair follicle atrophy |
|
Warm Plasma Tip |
Gentle stimulation of collagen production anti-aging care, especially for sensitive skin |
Early aging issues including losing skin, enlarged pores |
|
Plasma Jet Tip |
Targeted tackling with pigmentation, realizing skin rejuvenation causing no wounds |
Melasma, freckles, age spots |
Warm Plasma Treatment Frequency & Effects
-
Most customers achieve ideal results after 1–2 treatments.
-
Eye lift and skin renewal treatments may show visible results after the first session, with continued improvement lasting up to 90 days.
Post-Treatment Skin Response & Expected Recovery
-
Mild Redness: Typically subsides in 2–3 days. For the eye area, it may take 5–7 days.
-
Slight Swelling: More common around the eye area.
-
No Eschar or Black Scabs: Designed to avoid the visible scabbing commonly associated with traditional plasma pens.
-
Immediate Firming Appearance: Skin may look tighter after treatment, with continued improvement during the recovery process.
Note: Avoid scratching, rubbing, or peeling the treated area. Allow the skin to recover naturally.
Fusion Cold Plasma Device Operation Guide
Ozone Plasma
Ozone Plasma Technology
1. Installing the Ozone Plasma Probe:
Remove the ozone plasma probe and insert it into the ozone probe adapter. Securely connect the adapter to the probe port.
2. Selecting Mode & Adjusting Power:
On the touchscreen, select the Ozone Plasma icon. Once in the application interface, use the up and down arrows to adjust the power level.
3. Operating Instructions:
Press and hold the foot switch to operate the device. Release the foot switch every minute to prevent the device from overheating. After use, turn off the device, clean the probe with an alcohol-based disinfectant, allow it to dry, and store it properly.
Diamond Plasma
Diamond Plasma Technology
1. Installing the Diamond Plasma Probe:
Put the Diamond Plasma Probe through the Fixing Chuck and insert it into the Needle Holder. Insert the Needle Holder into the Probe Port and gently secure it with the Fixing Chuck.
2. Selecting Mode & Adjusting Power:
On the touchscreen, select the Diamond Plasma icon. Once in the application interface, use the up and down arrows to adjust the power level.
3. Operating Instructions:
Press and hold the foot switch to operate the device. Release the foot switch every minute to prevent the device from overheating. After use, turn off the device, clean the probe with an alcohol-based disinfectant, allow it to dry, and store it properly.
Gold Plasma
Gold Plasma Probe
1. Installing the Gold Plasma Probe:
Put the gold plasma probe through the fixing clamp and insert it into the needle holder. Insert the needle holder into the probe port and gently fix it with the fixing clamp.
2. Selecting Mode & Adjusting Power:
On the touchscreen, select the Gold Plasma icon. Once in the application interface, use the up and down arrows to adjust the power level.
3. Operating Instructions:
Press and hold the foot switch to operate the device. Release the foot switch every minute to prevent the device from overheating. After use, turn off the device, clean the probe with an alcohol-based disinfectant, allow it to dry, and store it properly.
Warm Plasma
Warm Plasma Technology
1. Installing the Warm Plasma Probe:
First, insert the Warm Plasma Probe through the lower part of the Needle Holder. Then, insert the Needle Holder into the probe port and gently secure it with the Fixing Clip.
2. Selecting Mode & Adjusting Power:
On the touchscreen, select the Warm Plasma icon. Once in the application interface, use the up and down arrows to adjust the power level.
3. Operating Instructions:
Press and hold the foot switch to operate the device. Release the foot switch every minute to prevent the device from overheating. After use, turn off the device, clean the probe with an alcohol-based disinfectant, allow it to dry, and store it properly.
Hyper Plasma
Hyper Plasma Technology
1. Installing the Hyper Plasma Probe:
Remove the Ultra Plasma Probe and insert the Ultra Adapter. Insert the needle into the needle holder, then the adapter, and finally the probe port.
2. Selecting Mode & Adjusting Power:
On the touchscreen, select the Hyper Plasma icon. Once in the application interface, use the up and down arrows to adjust the power level.
3. Operating Instructions:
Press and hold the foot switch to operate the device. Release the foot switch every 2 minutes to prevent the device from overheating. After use, turn off the device and the gas tank, clean the probe with an alcohol-based disinfectant, allow it to dry, and store it properly.
Scalp Plasma
Scalp Plasma Technology
1. Installing the Scalp Plasma Probe:
Take out the Scalp Plasma Probe and insert the Scalp Adapter. Insert the Needle into the Needle Holder, the Adapter, and the Probe Port.
2. Selecting Mode & Adjusting Power:
On the touchscreen, select the Scalp Plasma icon. Once in the application interface, use the up and down arrows to adjust the power level.
3. Operating Instructions:
Press and hold the foot switch to operate the device. Release the foot switch every 2 minutes to prevent the device from overheating. After use, turn off the device, clean the probe with an alcohol-based disinfectant, allow it to dry, and store it properly.
Plasma Roller
Plasma Roller Technology
1. Installing the Plasma Roller Probe:
Take out the required plasma roller probe and insert the roller adapter. Connect the probe port through the adapter.
2. Selecting Mode & Adjusting Power:
On the touchscreen, select the Derma Plasma icon. Once in the application interface, use the up and down arrows to adjust the power level.
3. Operating Instructions:
Press and hold the foot switch to operate the device. Release the foot switch every 2 minutes to prevent the device from overheating. After use, turn off the device, clean the probe with an alcohol-based disinfectant, allow it to dry, and store it properly.
Plasma Jet Probe
1. Installing the Plasma Jet Probe:
Remove and connect the Plasma Jet Probe directly to the Probe Port.
2. Selecting Mode & Adjusting Power:
On the touchscreen, select the Plasma Jet icon. Once in the application interface, use the up and down arrows to adjust the power level.
3. Operating Instructions:
Press and hold the foot switch to operate the device. Release the foot switch every 2 minutes to prevent the device from overheating. After use, turn off the device and the gas tank, clean the probe with an alcohol-based disinfectant, and store it in a dry place.
Awareness
-
All probes must be cleaned with an alcohol-based disinfectant and stored until dry.
-
To avoid overheating, lift the foot switch at the recommended intervals.
-
After closing the device, store all probes and accessories properly.
Fusion Plasma Care Guidance
Efficient Skin Rejuvenation, Long-Lasting Beauty Effect
Fusion Plasma adopts a non-invasive professional skin care technology to tighten the skin, fade acne scars, even out skin tone, and reduce pigmentation. It helps improve skin texture, translucency, and firmness.
It is essential to follow a proper care process after treatment to support treatment results and prolong the care effect.
Pre-Treatment Preparation to Optimize Treatment Effects
1. Avoid Sun Exposure
Avoid sun exposure for 2–4 weeks before treatment. Avoid tanning, sunbathing, or using tanning spray.
2. Stop Using Irritating Skin Care Products
To reduce skin irritation, avoid using skin care products containing ingredients such as fruit acids, retinoic acid, salicylic acid, glycolic acid, etc.
3. Postpone Other Aesthetic Treatments
Avoid fillers, Botox, microneedling, and PRP within 21 days before treatment. Avoid laser treatments or deep chemical peels within 90 days before treatment.
Post-Treatment Care to Support Proper Recovery
1. First 24 Hours
Avoid applying any skin care products to allow the skin to repair naturally.
2. First 5 Days
Use dedicated post-treatment care products to avoid possible irritation from regular skin care products.
3. First 48 Hours
Do not wear makeup. Keep the skin clean and avoid friction or contact with unclean environments.
4. First Week
Avoid steam, saunas, high-temperature environments, and strenuous exercise to avoid affecting skin recovery.
5. Continue for 2–4 Weeks
Use SPF30+ sunscreen to avoid UV exposure and help prevent pigmentation and spots.
Maintain Long-Term Effects and Rejuvenate Your Skin
After Fusion Plasma treatment, the skin will gradually improve, and the results can last 6–9 months. Depending on individual differences, some customers may need additional treatments. Each treatment should be separated by at least 4 weeks to ensure that the skin has enough time to repair and enhance the effect.
Specifications
-
Voltage: AC 110V / 220V
-
Power: 100 W
-
Display: 12.1″ HD Touchscreen
-
Gas Support: Argon / Helium Supported
-
Tip System: Interchangeable Plasma Tips
-
Operation Modes: Continuous / Intermittent
-
Interface Functions: Probe Selection, Working Time, Remaining Time, Shot Count, Start / Pause
-
Unit Dimensions: 15.9″ × 12.2″ × 7.1″ (40.4 × 31 × 18 cm)
-
Net Weight: 28.7 lbs (13 kg)
-
Package Dimensions: 15.7″ × 13.8″ × 22.4″ (40 × 35 × 57 cm)
-
Gross Weight: 48.5 lbs (22 kg)
-
Warranty: 36 Months
- Logo Customization: Support
Product Information
Product Information
Shipping & Returns
Shipping & Returns


Fusion Plasma Cold and Warm Pro Machine
Fusion Plasma Cold and Warm Pro Machine
Dual Plasma Care in One System
The Fusion Plasma Cold and Warm Pro Machine combines cold plasma and warm plasma functions in one compact aesthetic system. It helps salons expand their treatment menu with options for skin texture care, firming-focused services, calming care, scalp applications, and targeted aesthetic work.
Fusion Plasma: Integrating two cutting-edge beauty technologies, Canta Esthetic delivers a premium skin restoration journey.
Cold & Warm Plasma in One System
Fusion Plasma combines cold plasma and warm plasma functions in one professional aesthetic device, helping salons expand services for skin texture care, firming-focused treatments, calming care, and targeted skin renewal.
Warm Plasma for Firming-Focused Skin Care
Warm plasma delivers controlled plasma energy to the skin surface, helping support collagen production, improve the look of fine lines, and refine uneven skin texture.
It is designed for salons that want to offer skin-firming and rejuvenation-focused services with adjustable settings and interchangeable treatment tips.
Key Benefits
-
Supports firmer-looking skin
-
Helps refine fine lines and texture
-
Suitable for targeted facial care
-
Works with interchangeable plasma tips
Gas-Assisted Cold Plasma Care
Cold Plasma mode uses gas-assisted plasma output to support low-heat skin care applications. It is designed for salons that want to offer calming care, oil-control support, post-treatment skin comfort, and skin-balancing services.
Unlike regular warm plasma output, gas-assisted cold plasma is created with conductive gas support, such as argon or helium. This helps deliver a cooler plasma experience for sensitive, redness-prone, or blemish-prone skin-care routines.
Key Benefits
-
Calming Skin Support
Helps comfort skin after intensive facial treatments and supports a balanced-looking complexion. -
Oil-Control Care
Suitable for salons offering facial services for oily or blemish-prone skin types. -
Low-Heat Plasma Output
Designed for skin-care applications where comfort and controlled energy delivery matter. -
Post-Treatment Care Option
Can be added after selected facial or plasma treatments to support a cleaner, calmer treatment experience.
Warm Plasma vs. Traditional Plasma Pens
Warm Plasma is designed for salons that want a more flexible alternative to traditional point-by-point plasma pen services. With adjustable settings and interchangeable tips, it supports firming-focused care, texture refinement, and targeted skin renewal applications.
-
More Controlled Energy Delivery
Warm Plasma uses adjustable plasma output, allowing operators to start low and increase gradually based on the treatment area and client response. -
Firming-Focused Skin Care
Supports collagen-focused treatments for clients concerned with visible laxity, fine lines, and uneven texture. -
Flexible Treatment Options
Compared with traditional plasma pens that are often used for small point-by-point work, Fusion Plasma supports multiple tip options for facial, neck, scalp, and targeted aesthetic applications. -
Treatment-Friendly Workflow
The touchscreen interface supports probe selection, working time, remaining time, shot count, and start/pause control, helping salons manage each session with a clearer workflow.
|
Comparison items |
Warm Plasma Technology ✔ |
Traditional Fibroblast Technology ❌ |
|
Treatment |
Non-invasive, gentle, and efficient |
Invasive, causing epidermal carbonization.
|
|
Pain |
Almost no pain, low temperature, and high efficiency |
painful, anesthesia required |
|
Treatment time |
15-20 minutes for the whole face |
Treatment take longer than 20 minutes |
|
Recovery period |
Short, only 2-3 days required |
Long, eschar caused in treatment takes 7-10 days to fall off |
|
Scope of application |
Applicable to the face, around the eyes, and neck. |
Mainly used for point-to-point small-scale treatment |
|
Appearance after treatment |
There is no eschar, only slight white spots |
Obvious black eschar, easy to cause scabs |
✅ Warm Plasma utilizes upgraded technology to reduce trauma and accelerate restoration, making it ideal for customers who want to tighten and lift their skin without a long recovery period!
The core functions and applicable issues of the 8 handles
|
Probe type |
Core functions |
Applicable issues |
|
Hyper Plasma Tip |
Deep sterilization promotes hair growth. |
Acne, eczema, dermatitis, hair loss |
|
Ozone Plasma Tip |
Anti-inflammatory and anti-acne skin barrier restoration |
Rosacea, hormone-dependent dermatitis, postoperative infection |
|
Diamond Plasma Tip |
Gently rejuvenation for the whole face glowing. |
Rough skin, nasal folds, dull faces
|
|
Derma Plasma Tip
|
Precisely bumpin' skin for deep wrinkles and tackling acne and scars |
Stretch marks, acne scars, nasolabial folds |
|
Plasma roller tip |
Large area skin lifting and firming, assisted with essence penetration |
Sagging neck and losing facial contours |
|
Scalp Plasma Tip |
hair follicle activation and hair growth stimulation |
Hair loss, dandruff, hair follicle atrophy |
|
Warm Plasma Tip |
Gentle stimulation of collagen production anti-aging care, especially for sensitive skin |
Early aging issues including losing skin, enlarged pores |
|
Plasma Jet Tip |
Targeted tackling with pigmentation, realizing skin rejuvenation causing no wounds |
Melasma, freckles, age spots |
Warm Plasma Treatment Frequency & Effects
-
Most customers achieve ideal results after 1–2 treatments.
-
Eye lift and skin renewal treatments may show visible results after the first session, with continued improvement lasting up to 90 days.
Post-Treatment Skin Response & Expected Recovery
-
Mild Redness: Typically subsides in 2–3 days. For the eye area, it may take 5–7 days.
-
Slight Swelling: More common around the eye area.
-
No Eschar or Black Scabs: Designed to avoid the visible scabbing commonly associated with traditional plasma pens.
-
Immediate Firming Appearance: Skin may look tighter after treatment, with continued improvement during the recovery process.
Note: Avoid scratching, rubbing, or peeling the treated area. Allow the skin to recover naturally.
Fusion Cold Plasma Device Operation Guide
Ozone Plasma
Ozone Plasma Technology
1. Installing the Ozone Plasma Probe:
Remove the ozone plasma probe and insert it into the ozone probe adapter. Securely connect the adapter to the probe port.
2. Selecting Mode & Adjusting Power:
On the touchscreen, select the Ozone Plasma icon. Once in the application interface, use the up and down arrows to adjust the power level.
3. Operating Instructions:
Press and hold the foot switch to operate the device. Release the foot switch every minute to prevent the device from overheating. After use, turn off the device, clean the probe with an alcohol-based disinfectant, allow it to dry, and store it properly.
Diamond Plasma
Diamond Plasma Technology
1. Installing the Diamond Plasma Probe:
Put the Diamond Plasma Probe through the Fixing Chuck and insert it into the Needle Holder. Insert the Needle Holder into the Probe Port and gently secure it with the Fixing Chuck.
2. Selecting Mode & Adjusting Power:
On the touchscreen, select the Diamond Plasma icon. Once in the application interface, use the up and down arrows to adjust the power level.
3. Operating Instructions:
Press and hold the foot switch to operate the device. Release the foot switch every minute to prevent the device from overheating. After use, turn off the device, clean the probe with an alcohol-based disinfectant, allow it to dry, and store it properly.
Gold Plasma
Gold Plasma Probe
1. Installing the Gold Plasma Probe:
Put the gold plasma probe through the fixing clamp and insert it into the needle holder. Insert the needle holder into the probe port and gently fix it with the fixing clamp.
2. Selecting Mode & Adjusting Power:
On the touchscreen, select the Gold Plasma icon. Once in the application interface, use the up and down arrows to adjust the power level.
3. Operating Instructions:
Press and hold the foot switch to operate the device. Release the foot switch every minute to prevent the device from overheating. After use, turn off the device, clean the probe with an alcohol-based disinfectant, allow it to dry, and store it properly.
Warm Plasma
Warm Plasma Technology
1. Installing the Warm Plasma Probe:
First, insert the Warm Plasma Probe through the lower part of the Needle Holder. Then, insert the Needle Holder into the probe port and gently secure it with the Fixing Clip.
2. Selecting Mode & Adjusting Power:
On the touchscreen, select the Warm Plasma icon. Once in the application interface, use the up and down arrows to adjust the power level.
3. Operating Instructions:
Press and hold the foot switch to operate the device. Release the foot switch every minute to prevent the device from overheating. After use, turn off the device, clean the probe with an alcohol-based disinfectant, allow it to dry, and store it properly.
Hyper Plasma
Hyper Plasma Technology
1. Installing the Hyper Plasma Probe:
Remove the Ultra Plasma Probe and insert the Ultra Adapter. Insert the needle into the needle holder, then the adapter, and finally the probe port.
2. Selecting Mode & Adjusting Power:
On the touchscreen, select the Hyper Plasma icon. Once in the application interface, use the up and down arrows to adjust the power level.
3. Operating Instructions:
Press and hold the foot switch to operate the device. Release the foot switch every 2 minutes to prevent the device from overheating. After use, turn off the device and the gas tank, clean the probe with an alcohol-based disinfectant, allow it to dry, and store it properly.
Scalp Plasma
Scalp Plasma Technology
1. Installing the Scalp Plasma Probe:
Take out the Scalp Plasma Probe and insert the Scalp Adapter. Insert the Needle into the Needle Holder, the Adapter, and the Probe Port.
2. Selecting Mode & Adjusting Power:
On the touchscreen, select the Scalp Plasma icon. Once in the application interface, use the up and down arrows to adjust the power level.
3. Operating Instructions:
Press and hold the foot switch to operate the device. Release the foot switch every 2 minutes to prevent the device from overheating. After use, turn off the device, clean the probe with an alcohol-based disinfectant, allow it to dry, and store it properly.
Plasma Roller
Plasma Roller Technology
1. Installing the Plasma Roller Probe:
Take out the required plasma roller probe and insert the roller adapter. Connect the probe port through the adapter.
2. Selecting Mode & Adjusting Power:
On the touchscreen, select the Derma Plasma icon. Once in the application interface, use the up and down arrows to adjust the power level.
3. Operating Instructions:
Press and hold the foot switch to operate the device. Release the foot switch every 2 minutes to prevent the device from overheating. After use, turn off the device, clean the probe with an alcohol-based disinfectant, allow it to dry, and store it properly.
Plasma Jet Probe
1. Installing the Plasma Jet Probe:
Remove and connect the Plasma Jet Probe directly to the Probe Port.
2. Selecting Mode & Adjusting Power:
On the touchscreen, select the Plasma Jet icon. Once in the application interface, use the up and down arrows to adjust the power level.
3. Operating Instructions:
Press and hold the foot switch to operate the device. Release the foot switch every 2 minutes to prevent the device from overheating. After use, turn off the device and the gas tank, clean the probe with an alcohol-based disinfectant, and store it in a dry place.
Awareness
-
All probes must be cleaned with an alcohol-based disinfectant and stored until dry.
-
To avoid overheating, lift the foot switch at the recommended intervals.
-
After closing the device, store all probes and accessories properly.
Fusion Plasma Care Guidance
Efficient Skin Rejuvenation, Long-Lasting Beauty Effect
Fusion Plasma adopts a non-invasive professional skin care technology to tighten the skin, fade acne scars, even out skin tone, and reduce pigmentation. It helps improve skin texture, translucency, and firmness.
It is essential to follow a proper care process after treatment to support treatment results and prolong the care effect.
Pre-Treatment Preparation to Optimize Treatment Effects
1. Avoid Sun Exposure
Avoid sun exposure for 2–4 weeks before treatment. Avoid tanning, sunbathing, or using tanning spray.
2. Stop Using Irritating Skin Care Products
To reduce skin irritation, avoid using skin care products containing ingredients such as fruit acids, retinoic acid, salicylic acid, glycolic acid, etc.
3. Postpone Other Aesthetic Treatments
Avoid fillers, Botox, microneedling, and PRP within 21 days before treatment. Avoid laser treatments or deep chemical peels within 90 days before treatment.
Post-Treatment Care to Support Proper Recovery
1. First 24 Hours
Avoid applying any skin care products to allow the skin to repair naturally.
2. First 5 Days
Use dedicated post-treatment care products to avoid possible irritation from regular skin care products.
3. First 48 Hours
Do not wear makeup. Keep the skin clean and avoid friction or contact with unclean environments.
4. First Week
Avoid steam, saunas, high-temperature environments, and strenuous exercise to avoid affecting skin recovery.
5. Continue for 2–4 Weeks
Use SPF30+ sunscreen to avoid UV exposure and help prevent pigmentation and spots.
Maintain Long-Term Effects and Rejuvenate Your Skin
After Fusion Plasma treatment, the skin will gradually improve, and the results can last 6–9 months. Depending on individual differences, some customers may need additional treatments. Each treatment should be separated by at least 4 weeks to ensure that the skin has enough time to repair and enhance the effect.
Specifications
-
Voltage: AC 110V / 220V
-
Power: 100 W
-
Display: 12.1″ HD Touchscreen
-
Gas Support: Argon / Helium Supported
-
Tip System: Interchangeable Plasma Tips
-
Operation Modes: Continuous / Intermittent
-
Interface Functions: Probe Selection, Working Time, Remaining Time, Shot Count, Start / Pause
-
Unit Dimensions: 15.9″ × 12.2″ × 7.1″ (40.4 × 31 × 18 cm)
-
Net Weight: 28.7 lbs (13 kg)
-
Package Dimensions: 15.7″ × 13.8″ × 22.4″ (40 × 35 × 57 cm)
-
Gross Weight: 48.5 lbs (22 kg)
-
Warranty: 36 Months
- Logo Customization: Support
Original: $5,999.00
-65%$5,999.00
$2,099.65Product Information
Product Information
Shipping & Returns
Shipping & Returns
Description
Dual Plasma Care in One System
The Fusion Plasma Cold and Warm Pro Machine combines cold plasma and warm plasma functions in one compact aesthetic system. It helps salons expand their treatment menu with options for skin texture care, firming-focused services, calming care, scalp applications, and targeted aesthetic work.
Fusion Plasma: Integrating two cutting-edge beauty technologies, Canta Esthetic delivers a premium skin restoration journey.
Cold & Warm Plasma in One System
Fusion Plasma combines cold plasma and warm plasma functions in one professional aesthetic device, helping salons expand services for skin texture care, firming-focused treatments, calming care, and targeted skin renewal.
Warm Plasma for Firming-Focused Skin Care
Warm plasma delivers controlled plasma energy to the skin surface, helping support collagen production, improve the look of fine lines, and refine uneven skin texture.
It is designed for salons that want to offer skin-firming and rejuvenation-focused services with adjustable settings and interchangeable treatment tips.
Key Benefits
-
Supports firmer-looking skin
-
Helps refine fine lines and texture
-
Suitable for targeted facial care
-
Works with interchangeable plasma tips
Gas-Assisted Cold Plasma Care
Cold Plasma mode uses gas-assisted plasma output to support low-heat skin care applications. It is designed for salons that want to offer calming care, oil-control support, post-treatment skin comfort, and skin-balancing services.
Unlike regular warm plasma output, gas-assisted cold plasma is created with conductive gas support, such as argon or helium. This helps deliver a cooler plasma experience for sensitive, redness-prone, or blemish-prone skin-care routines.
Key Benefits
-
Calming Skin Support
Helps comfort skin after intensive facial treatments and supports a balanced-looking complexion. -
Oil-Control Care
Suitable for salons offering facial services for oily or blemish-prone skin types. -
Low-Heat Plasma Output
Designed for skin-care applications where comfort and controlled energy delivery matter. -
Post-Treatment Care Option
Can be added after selected facial or plasma treatments to support a cleaner, calmer treatment experience.
Warm Plasma vs. Traditional Plasma Pens
Warm Plasma is designed for salons that want a more flexible alternative to traditional point-by-point plasma pen services. With adjustable settings and interchangeable tips, it supports firming-focused care, texture refinement, and targeted skin renewal applications.
-
More Controlled Energy Delivery
Warm Plasma uses adjustable plasma output, allowing operators to start low and increase gradually based on the treatment area and client response. -
Firming-Focused Skin Care
Supports collagen-focused treatments for clients concerned with visible laxity, fine lines, and uneven texture. -
Flexible Treatment Options
Compared with traditional plasma pens that are often used for small point-by-point work, Fusion Plasma supports multiple tip options for facial, neck, scalp, and targeted aesthetic applications. -
Treatment-Friendly Workflow
The touchscreen interface supports probe selection, working time, remaining time, shot count, and start/pause control, helping salons manage each session with a clearer workflow.
|
Comparison items |
Warm Plasma Technology ✔ |
Traditional Fibroblast Technology ❌ |
|
Treatment |
Non-invasive, gentle, and efficient |
Invasive, causing epidermal carbonization.
|
|
Pain |
Almost no pain, low temperature, and high efficiency |
painful, anesthesia required |
|
Treatment time |
15-20 minutes for the whole face |
Treatment take longer than 20 minutes |
|
Recovery period |
Short, only 2-3 days required |
Long, eschar caused in treatment takes 7-10 days to fall off |
|
Scope of application |
Applicable to the face, around the eyes, and neck. |
Mainly used for point-to-point small-scale treatment |
|
Appearance after treatment |
There is no eschar, only slight white spots |
Obvious black eschar, easy to cause scabs |
✅ Warm Plasma utilizes upgraded technology to reduce trauma and accelerate restoration, making it ideal for customers who want to tighten and lift their skin without a long recovery period!
The core functions and applicable issues of the 8 handles
|
Probe type |
Core functions |
Applicable issues |
|
Hyper Plasma Tip |
Deep sterilization promotes hair growth. |
Acne, eczema, dermatitis, hair loss |
|
Ozone Plasma Tip |
Anti-inflammatory and anti-acne skin barrier restoration |
Rosacea, hormone-dependent dermatitis, postoperative infection |
|
Diamond Plasma Tip |
Gently rejuvenation for the whole face glowing. |
Rough skin, nasal folds, dull faces
|
|
Derma Plasma Tip
|
Precisely bumpin' skin for deep wrinkles and tackling acne and scars |
Stretch marks, acne scars, nasolabial folds |
|
Plasma roller tip |
Large area skin lifting and firming, assisted with essence penetration |
Sagging neck and losing facial contours |
|
Scalp Plasma Tip |
hair follicle activation and hair growth stimulation |
Hair loss, dandruff, hair follicle atrophy |
|
Warm Plasma Tip |
Gentle stimulation of collagen production anti-aging care, especially for sensitive skin |
Early aging issues including losing skin, enlarged pores |
|
Plasma Jet Tip |
Targeted tackling with pigmentation, realizing skin rejuvenation causing no wounds |
Melasma, freckles, age spots |
Warm Plasma Treatment Frequency & Effects
-
Most customers achieve ideal results after 1–2 treatments.
-
Eye lift and skin renewal treatments may show visible results after the first session, with continued improvement lasting up to 90 days.
Post-Treatment Skin Response & Expected Recovery
-
Mild Redness: Typically subsides in 2–3 days. For the eye area, it may take 5–7 days.
-
Slight Swelling: More common around the eye area.
-
No Eschar or Black Scabs: Designed to avoid the visible scabbing commonly associated with traditional plasma pens.
-
Immediate Firming Appearance: Skin may look tighter after treatment, with continued improvement during the recovery process.
Note: Avoid scratching, rubbing, or peeling the treated area. Allow the skin to recover naturally.
Fusion Cold Plasma Device Operation Guide
Ozone Plasma
Ozone Plasma Technology
1. Installing the Ozone Plasma Probe:
Remove the ozone plasma probe and insert it into the ozone probe adapter. Securely connect the adapter to the probe port.
2. Selecting Mode & Adjusting Power:
On the touchscreen, select the Ozone Plasma icon. Once in the application interface, use the up and down arrows to adjust the power level.
3. Operating Instructions:
Press and hold the foot switch to operate the device. Release the foot switch every minute to prevent the device from overheating. After use, turn off the device, clean the probe with an alcohol-based disinfectant, allow it to dry, and store it properly.
Diamond Plasma
Diamond Plasma Technology
1. Installing the Diamond Plasma Probe:
Put the Diamond Plasma Probe through the Fixing Chuck and insert it into the Needle Holder. Insert the Needle Holder into the Probe Port and gently secure it with the Fixing Chuck.
2. Selecting Mode & Adjusting Power:
On the touchscreen, select the Diamond Plasma icon. Once in the application interface, use the up and down arrows to adjust the power level.
3. Operating Instructions:
Press and hold the foot switch to operate the device. Release the foot switch every minute to prevent the device from overheating. After use, turn off the device, clean the probe with an alcohol-based disinfectant, allow it to dry, and store it properly.
Gold Plasma
Gold Plasma Probe
1. Installing the Gold Plasma Probe:
Put the gold plasma probe through the fixing clamp and insert it into the needle holder. Insert the needle holder into the probe port and gently fix it with the fixing clamp.
2. Selecting Mode & Adjusting Power:
On the touchscreen, select the Gold Plasma icon. Once in the application interface, use the up and down arrows to adjust the power level.
3. Operating Instructions:
Press and hold the foot switch to operate the device. Release the foot switch every minute to prevent the device from overheating. After use, turn off the device, clean the probe with an alcohol-based disinfectant, allow it to dry, and store it properly.
Warm Plasma
Warm Plasma Technology
1. Installing the Warm Plasma Probe:
First, insert the Warm Plasma Probe through the lower part of the Needle Holder. Then, insert the Needle Holder into the probe port and gently secure it with the Fixing Clip.
2. Selecting Mode & Adjusting Power:
On the touchscreen, select the Warm Plasma icon. Once in the application interface, use the up and down arrows to adjust the power level.
3. Operating Instructions:
Press and hold the foot switch to operate the device. Release the foot switch every minute to prevent the device from overheating. After use, turn off the device, clean the probe with an alcohol-based disinfectant, allow it to dry, and store it properly.
Hyper Plasma
Hyper Plasma Technology
1. Installing the Hyper Plasma Probe:
Remove the Ultra Plasma Probe and insert the Ultra Adapter. Insert the needle into the needle holder, then the adapter, and finally the probe port.
2. Selecting Mode & Adjusting Power:
On the touchscreen, select the Hyper Plasma icon. Once in the application interface, use the up and down arrows to adjust the power level.
3. Operating Instructions:
Press and hold the foot switch to operate the device. Release the foot switch every 2 minutes to prevent the device from overheating. After use, turn off the device and the gas tank, clean the probe with an alcohol-based disinfectant, allow it to dry, and store it properly.
Scalp Plasma
Scalp Plasma Technology
1. Installing the Scalp Plasma Probe:
Take out the Scalp Plasma Probe and insert the Scalp Adapter. Insert the Needle into the Needle Holder, the Adapter, and the Probe Port.
2. Selecting Mode & Adjusting Power:
On the touchscreen, select the Scalp Plasma icon. Once in the application interface, use the up and down arrows to adjust the power level.
3. Operating Instructions:
Press and hold the foot switch to operate the device. Release the foot switch every 2 minutes to prevent the device from overheating. After use, turn off the device, clean the probe with an alcohol-based disinfectant, allow it to dry, and store it properly.
Plasma Roller
Plasma Roller Technology
1. Installing the Plasma Roller Probe:
Take out the required plasma roller probe and insert the roller adapter. Connect the probe port through the adapter.
2. Selecting Mode & Adjusting Power:
On the touchscreen, select the Derma Plasma icon. Once in the application interface, use the up and down arrows to adjust the power level.
3. Operating Instructions:
Press and hold the foot switch to operate the device. Release the foot switch every 2 minutes to prevent the device from overheating. After use, turn off the device, clean the probe with an alcohol-based disinfectant, allow it to dry, and store it properly.
Plasma Jet Probe
1. Installing the Plasma Jet Probe:
Remove and connect the Plasma Jet Probe directly to the Probe Port.
2. Selecting Mode & Adjusting Power:
On the touchscreen, select the Plasma Jet icon. Once in the application interface, use the up and down arrows to adjust the power level.
3. Operating Instructions:
Press and hold the foot switch to operate the device. Release the foot switch every 2 minutes to prevent the device from overheating. After use, turn off the device and the gas tank, clean the probe with an alcohol-based disinfectant, and store it in a dry place.
Awareness
-
All probes must be cleaned with an alcohol-based disinfectant and stored until dry.
-
To avoid overheating, lift the foot switch at the recommended intervals.
-
After closing the device, store all probes and accessories properly.
Fusion Plasma Care Guidance
Efficient Skin Rejuvenation, Long-Lasting Beauty Effect
Fusion Plasma adopts a non-invasive professional skin care technology to tighten the skin, fade acne scars, even out skin tone, and reduce pigmentation. It helps improve skin texture, translucency, and firmness.
It is essential to follow a proper care process after treatment to support treatment results and prolong the care effect.
Pre-Treatment Preparation to Optimize Treatment Effects
1. Avoid Sun Exposure
Avoid sun exposure for 2–4 weeks before treatment. Avoid tanning, sunbathing, or using tanning spray.
2. Stop Using Irritating Skin Care Products
To reduce skin irritation, avoid using skin care products containing ingredients such as fruit acids, retinoic acid, salicylic acid, glycolic acid, etc.
3. Postpone Other Aesthetic Treatments
Avoid fillers, Botox, microneedling, and PRP within 21 days before treatment. Avoid laser treatments or deep chemical peels within 90 days before treatment.
Post-Treatment Care to Support Proper Recovery
1. First 24 Hours
Avoid applying any skin care products to allow the skin to repair naturally.
2. First 5 Days
Use dedicated post-treatment care products to avoid possible irritation from regular skin care products.
3. First 48 Hours
Do not wear makeup. Keep the skin clean and avoid friction or contact with unclean environments.
4. First Week
Avoid steam, saunas, high-temperature environments, and strenuous exercise to avoid affecting skin recovery.
5. Continue for 2–4 Weeks
Use SPF30+ sunscreen to avoid UV exposure and help prevent pigmentation and spots.
Maintain Long-Term Effects and Rejuvenate Your Skin
After Fusion Plasma treatment, the skin will gradually improve, and the results can last 6–9 months. Depending on individual differences, some customers may need additional treatments. Each treatment should be separated by at least 4 weeks to ensure that the skin has enough time to repair and enhance the effect.
Specifications
-
Voltage: AC 110V / 220V
-
Power: 100 W
-
Display: 12.1″ HD Touchscreen
-
Gas Support: Argon / Helium Supported
-
Tip System: Interchangeable Plasma Tips
-
Operation Modes: Continuous / Intermittent
-
Interface Functions: Probe Selection, Working Time, Remaining Time, Shot Count, Start / Pause
-
Unit Dimensions: 15.9″ × 12.2″ × 7.1″ (40.4 × 31 × 18 cm)
-
Net Weight: 28.7 lbs (13 kg)
-
Package Dimensions: 15.7″ × 13.8″ × 22.4″ (40 × 35 × 57 cm)
-
Gross Weight: 48.5 lbs (22 kg)
-
Warranty: 36 Months
- Logo Customization: Support